
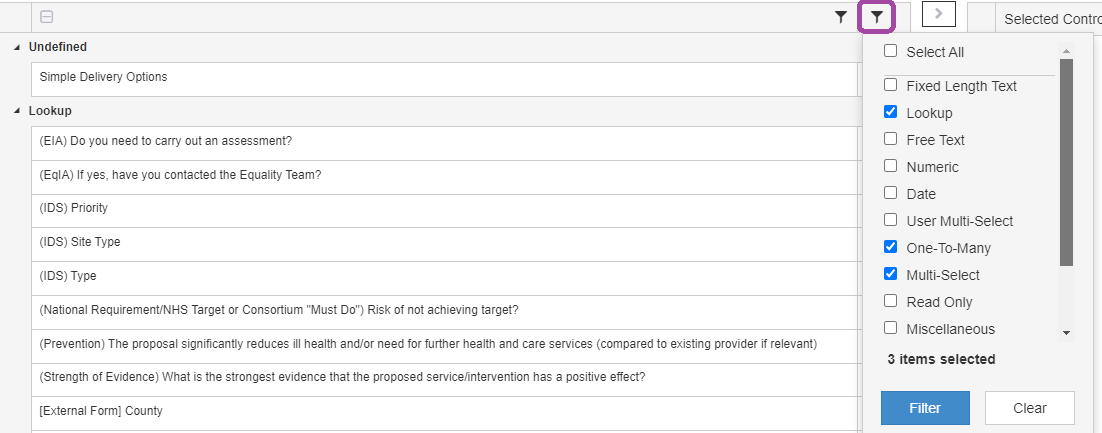
Search & filter options
The full list of fields will be visible by default and grouped together based on their field type. To make it easier to narrow your search use the key word and filter options.
Key Word Filter:

Field Type Filter:
Field properties
To the right of every field in the list, there is an icon, which when clicked will reveal the field properties.
- Description: This is the system given name of the field and should be used for searches.
- Database Column: This is the database name of the field and is used when creating report mock-ups.
- Lookup: This details the name of the corresponding lookup table. See How to populate a lookup table.
- Notes: This details any useful information about the field and is only editable by TMI staff.
- Generic Help: Use this box to add help text which can then be ‘switched on’ as needed whenever this field is used within a stage or governance report. See How to add help for more information.
Add a field
Click on the field you want to add and then select the > button to move it into the ‘Selected Controls’ list on the right. Alternatively, simply double click on the field to select and move.
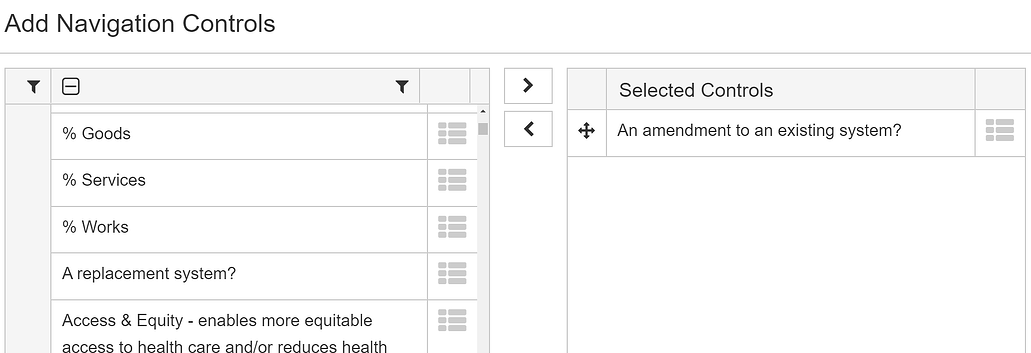
Re-order fields
Once all the required fields for your navigation section are in the list on the right, you can re-order them by using the cross shaped button to drag and drop them into place. Alternatively, you can re-order them after the fields have been added to the navigation section. Select OK to add all new fields to your section.
One-to-many tables
One-to-many tables have their own set of sub-fields so that you can record multiple entries for a particular theme, such as Risks, Issues, Milestones etc. The one-to-many control must be added into a navigation section before you can add any sub fields to it.
Once added into the navigation section as per the steps above, a one-to-many control will have an Add button to the right, instead of an Edit button. The Edit button will be relocated under the the sub menu, along with the properties:
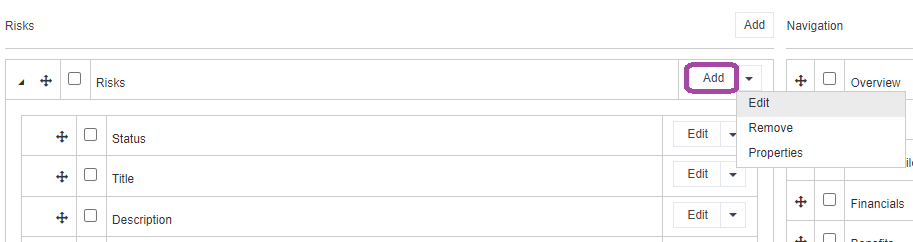
Clicking on Add against the one-to-many will open a new screen where additional sub fields can be searched for and added to the control. Once added into the one-to-many control, you will be able to edit each individual field as normal. You can identify specific fields within the one-to-many to show in the summary view. This allows key items to be viewed at a glance.
Remember
- Fields are the questions that need to be answered within that section i.e. if you want to outline the background of the project you would choose a field that asks a question such as 'Why are we undertaking this project?'.
- When searching for a new field, think about how you want the answer recorded and choose the appropriate field type i.e. lookup for predefined answers, text field for details.
- If the field name is orange it means it's already in use in the stage or governance report you are working in and can't be used again. It is there for information purposes only.
- The same fields must be used in each of your stages (for the same purpose) and (where relevant), each of your governance reports. This is to ensure that the data entered by the user can flow through the lifecycle stages and into the governance reports as part of an approval process.