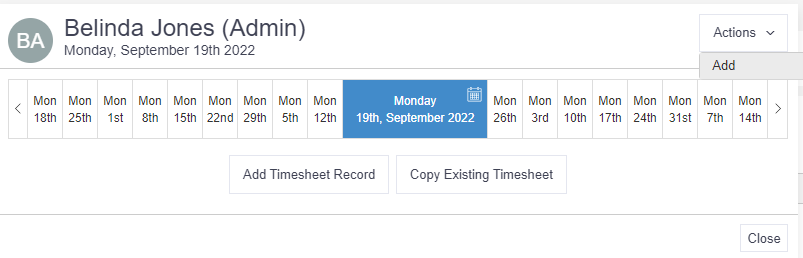
Click on User Profile > Timesheets. The Timesheet screen will default to the current week and allow the user to navigate to all previous or future weeks using the < > buttons at either end. Each week will start on a Monday. From here either add a new timesheet or copy an existing one.
Add a new Timesheet
To add a blank timesheet or to add one for the first time, either click on the 'Add Timesheet Record' button or click Actions > Add.
Select either a non project activity to record time against, or a specific project (project list is based on user involvements).
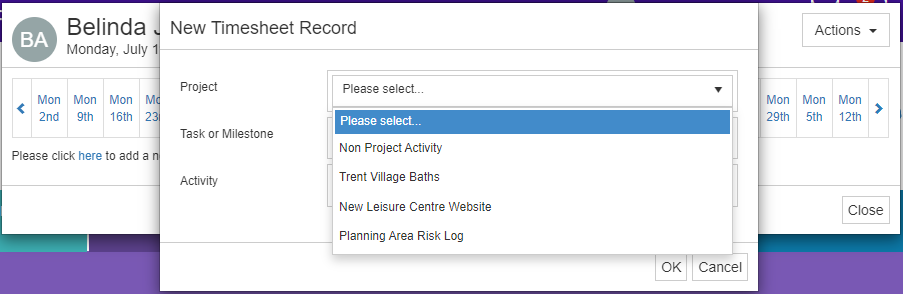
- Project – select what you want to record time against i.e. a specific project or non project related activity.
- Task or Milestone – if a project has been selected in the first dropdown, this will display a list of associated milestones and tasks. If a non project activity has been selected, this will provide a list of activities i.e. meeting, holiday.
- Activity – a free-text box for any narrative on the work completed. This is not mandatory.
Complete the pop-up and click OK. Time can now be added for that week. To add additional projects or activities to the timesheet for that week, click Actions > Add and repeat steps.
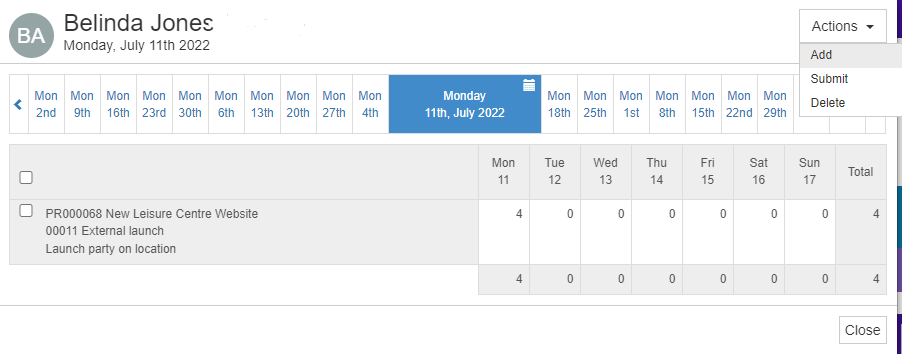
When all time for the week has been recorded, click Actions > Submit. Note: use the checkboxes to just submit certain activities.
Copy an existing Timesheet
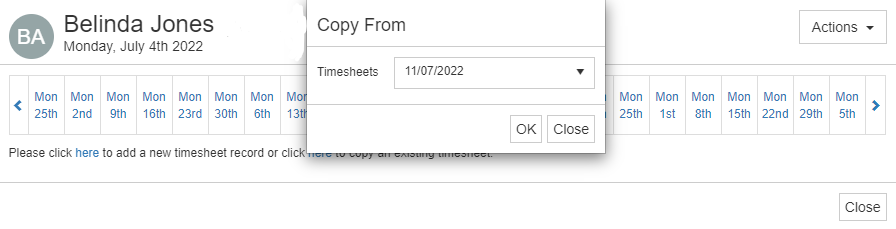
After the first timesheet has been approved, the ability to copy previous timesheets will become available. To copy a previous timesheet, click on the 'Copy Existing Timesheet' button to reveal a pop-up.

Select a timesheet date to copy and click OK.
The new timesheet will now be presented, containing the projects and tasks from the copied timesheet. Complete the timesheet as outlined above. When all time for the week has been recorded, click Actions > Submit. Note: use the checkboxes to just submit certain activities.
Remember
- You must be added to a project or activity in order to record time against it.
- Timesheets can be set to automatically approve upon submission. Contact Verto Support to enable this workflow (System Administrators only).