Input templates can be created in a few simple steps:
- Contact Verto Support to request the addition of input templates on your Test Site. Provide the names of each template. These will be available for you to configure in Administration Cog >Configuration > Input Templates.

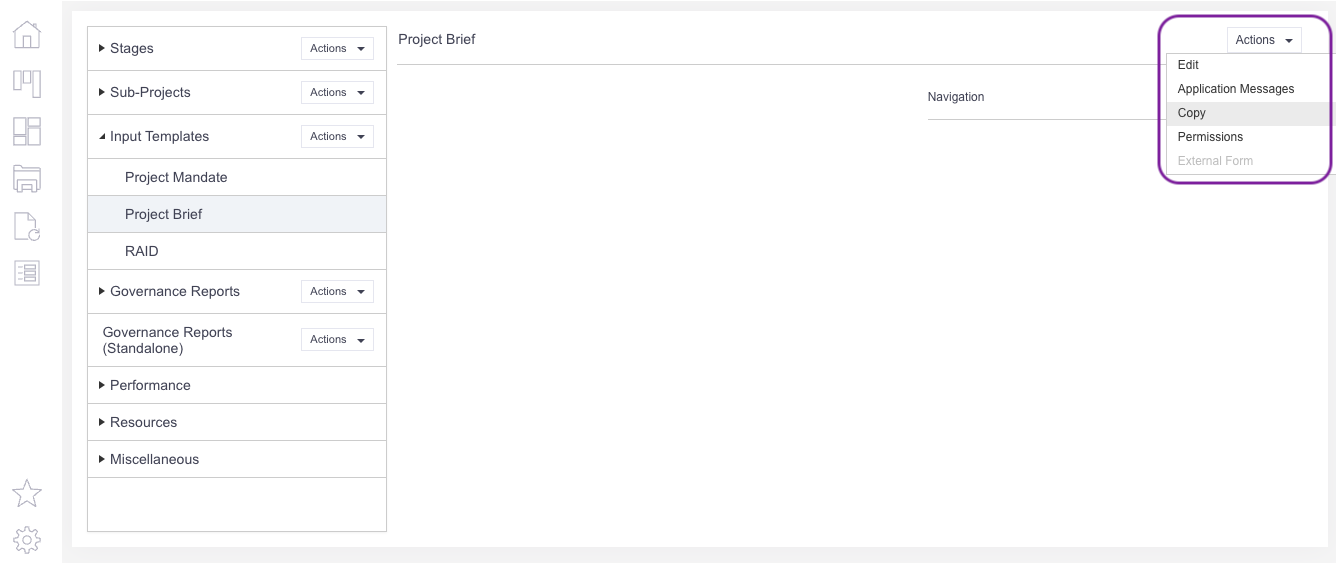
2. Expand the triangle next to Input Templates, choose an input template and click on Actions > Copy to copy the configuration from a stage onto it. The stages will be displayed in a list. Select the stage you wish to copy FROM and click OK.
3. Amend the configuration for the input template as needed, using the same method for configuring a stage.
4. To attach the input template to the relevant stage, go to the Administration Cog > Configuration. In the menu on the left-hand side, expand the triangle next to Stages and then select the relevant stage you wish to add the input template to. Click on the Add button to the right of the Actions menu (bottom right hand corner) and enter ‘Input Templates’ in the description field and click OK.
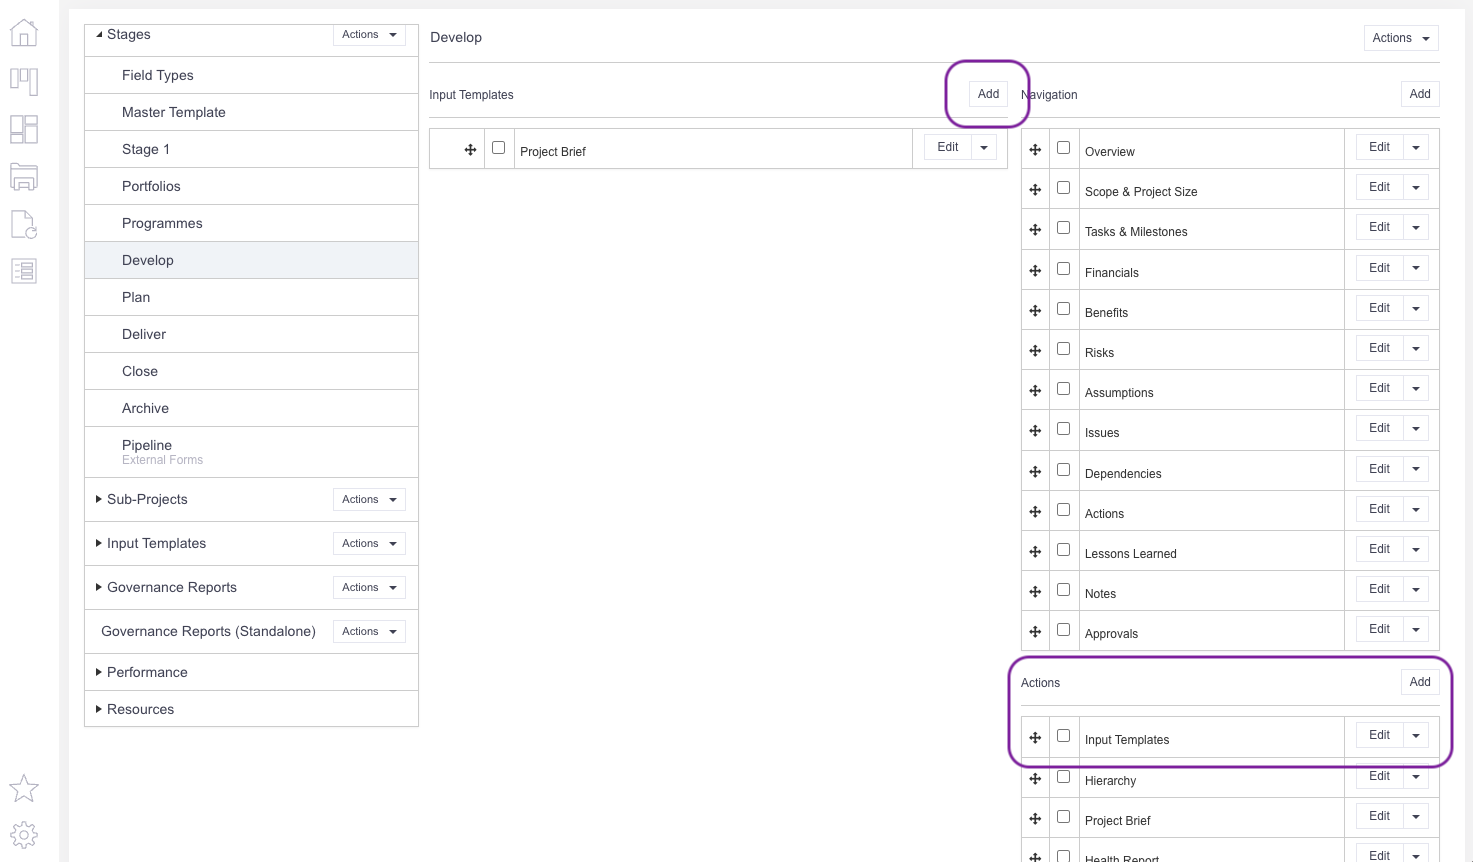 5. To complete the process, attach the input template to the new menu description. Click once on input templates in the Actions Menu to reveal the Add button on the left-hand side of the screen. Click Add. Choose your input template from the list and click OK. The input template will now be attached to the stage.
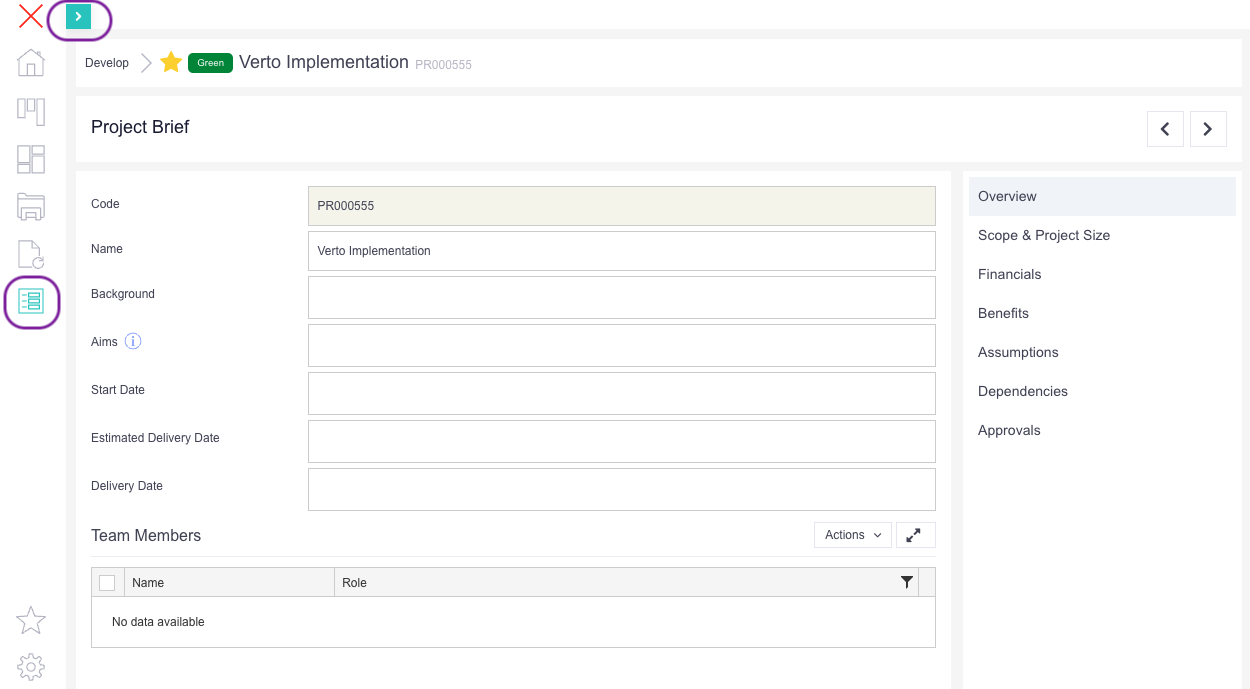
6. Users can access the template by clicking on the Templates icon in the sidebar for their project. All templates will be listed in the flyout menu. Click on the relevant template and add data.