Creating an avatar is a great way to add a personal touch to your boards and projects. The avatar will be displayed wherever you see your name.
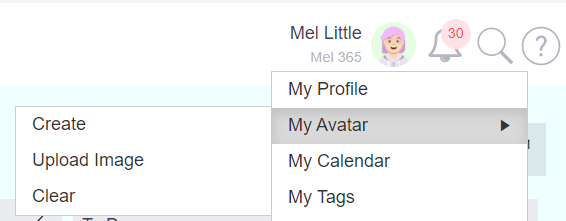
To create an avatar, simply click on your User Profile icon in the top right-hand corner of the screen and then select My Avatar.

From here you can do the following:
- Create a new avatar
- Upload an image
- Clear the existing avatar or image. Note: without an avatar or image uploaded, the profile picture will automatically show your initials.
Create avatar
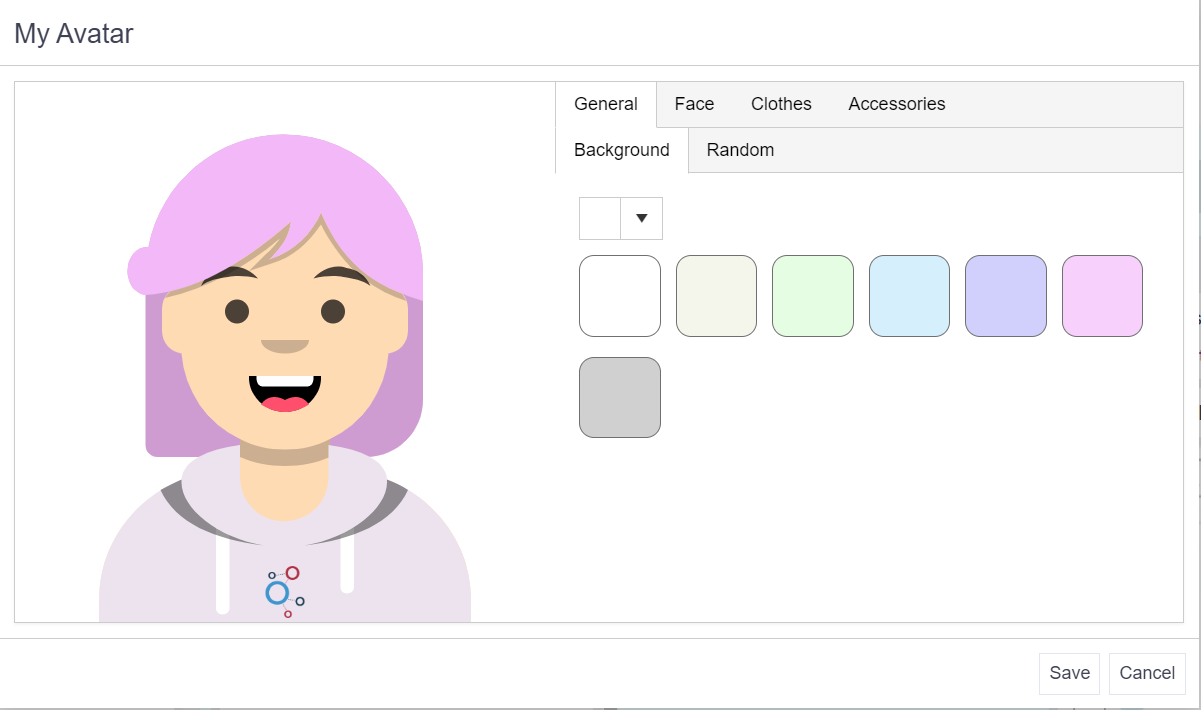
Click on User Profile > My Avatar > Create. A pop-up will appear containing an autogenerated avatar image which can then be amended.

The options are as follows:
- Background - select the colour of your avatar background. From here you can also click on the Random tab and allow Verto to create an avatar image for you.
- Face - select specific facial features such as skin colour, eye and mouth shape, hair style and colour.
- Clothes - select clothing colour and design.
- Accessories - select glasses, earrings and tattoo options.
When you're happy with your selections, simply click Save. Your avatar will now be displayed against your user profile.
Upload image
Click on User Profile > My Avatar > Upload Image. A new pop-up will appear and will automatically open your PC drive for you to select your preferred image. Once you're happy with the image you have selected, simply click Confirm to insert it.
Clear
Click on User Profile > My Avatar > Clear to re-set your current avatar or image back to the default initials icon.