Group permissions enable super permissions to be granted to individual users, on a project by project basis.
- Administrator Groups – any user assigned to an Administrator Group will be have Edit access to the project and will receive any system generated emails pertaining to that project. They will also be able to approve projects/governance reports and bypass the workflows.
- Executive Groups – any user assigned to an Executive Group will have View access to the project.
There are four options within Group Permissions:
- Administrator Group Users – used to add individual users into an Administrator Group which can then be attached at the project level.
- Administrator Groups – used to create a group that individual users can be added into in order to have administrator rights at the project level.
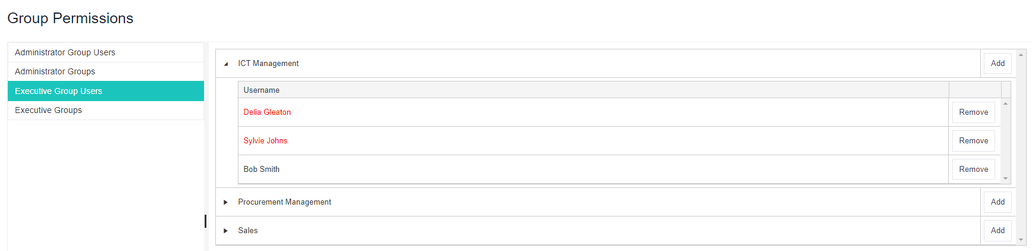
- Executive Group Users – used to add individual users into an Executive Group which can then be attached at individual project level.
- Executive Groups – used to create a group that individual users can be added into in order to have executive rights at project level.

Set up a group permission
1. Create a Group
Go to the Administration Cog > Group Permissions and select either the Administrator or Executive Group option. Click Actions > Add and enter a Description for the new group, tick the box to indicate that the group is active and click OK.
2. Add Users to the Group
Select the Administrator or Executive Group Users option from within the Group Permissions area. Next, locate the group name from the list on the right and click Add. Enter the user's name into the pop-up, select them from the list displayed and click OK.
To check the user has been successfully added into the group, click on the triangle next to the group name to expand the list of users.
Top Tip
- Users can be removed from a group using the same steps as outlined above but instead, selecting ‘Remove’ against the relevant name.
3. Add the Group to a Project
Locate the required project and click on the Actions Menu > Group Permissions. Choose from the list of available groups displayed for either Administrator or Executive and click OK. The group is now attached to the project.
Advice
- Only System/Stage Administrators can create and maintain group permissions. It will not be accessible to anyone who is part of an Administration Group, attached to a project.